大多数审批流程要么藏在人的脑子里,要么埋在 wiki 的一段话里:「交给你经理,超过 5000 就还要财务。」正是这种模糊让请求卡住。审批流程图把这些没写下来的规则变成任何人都能照着走的图。
本文用一个真实的「请求到签批」流程作例子,讲解如何画一个。格式基础参见什么是流程图?和流程图符号指南。
审批流程图展示什么
一个好的审批流程图回答三个纯文字通常说不清的问题:
- 谁来审核请求,按什么顺序?
- 请求不完整或被驳回时会怎样?
- 批准后的请求最终去了哪里?
第二个问题是大多数人会忘的。一个线性的「提交 → 批准 → 完成」图不是审批流——是一厢情愿。真实的审批有驳回环,把它画出来才是关键。
分步讲解
下面是我们的审批流程图模板所画的流程,你可以拿它当自己流程的范本:
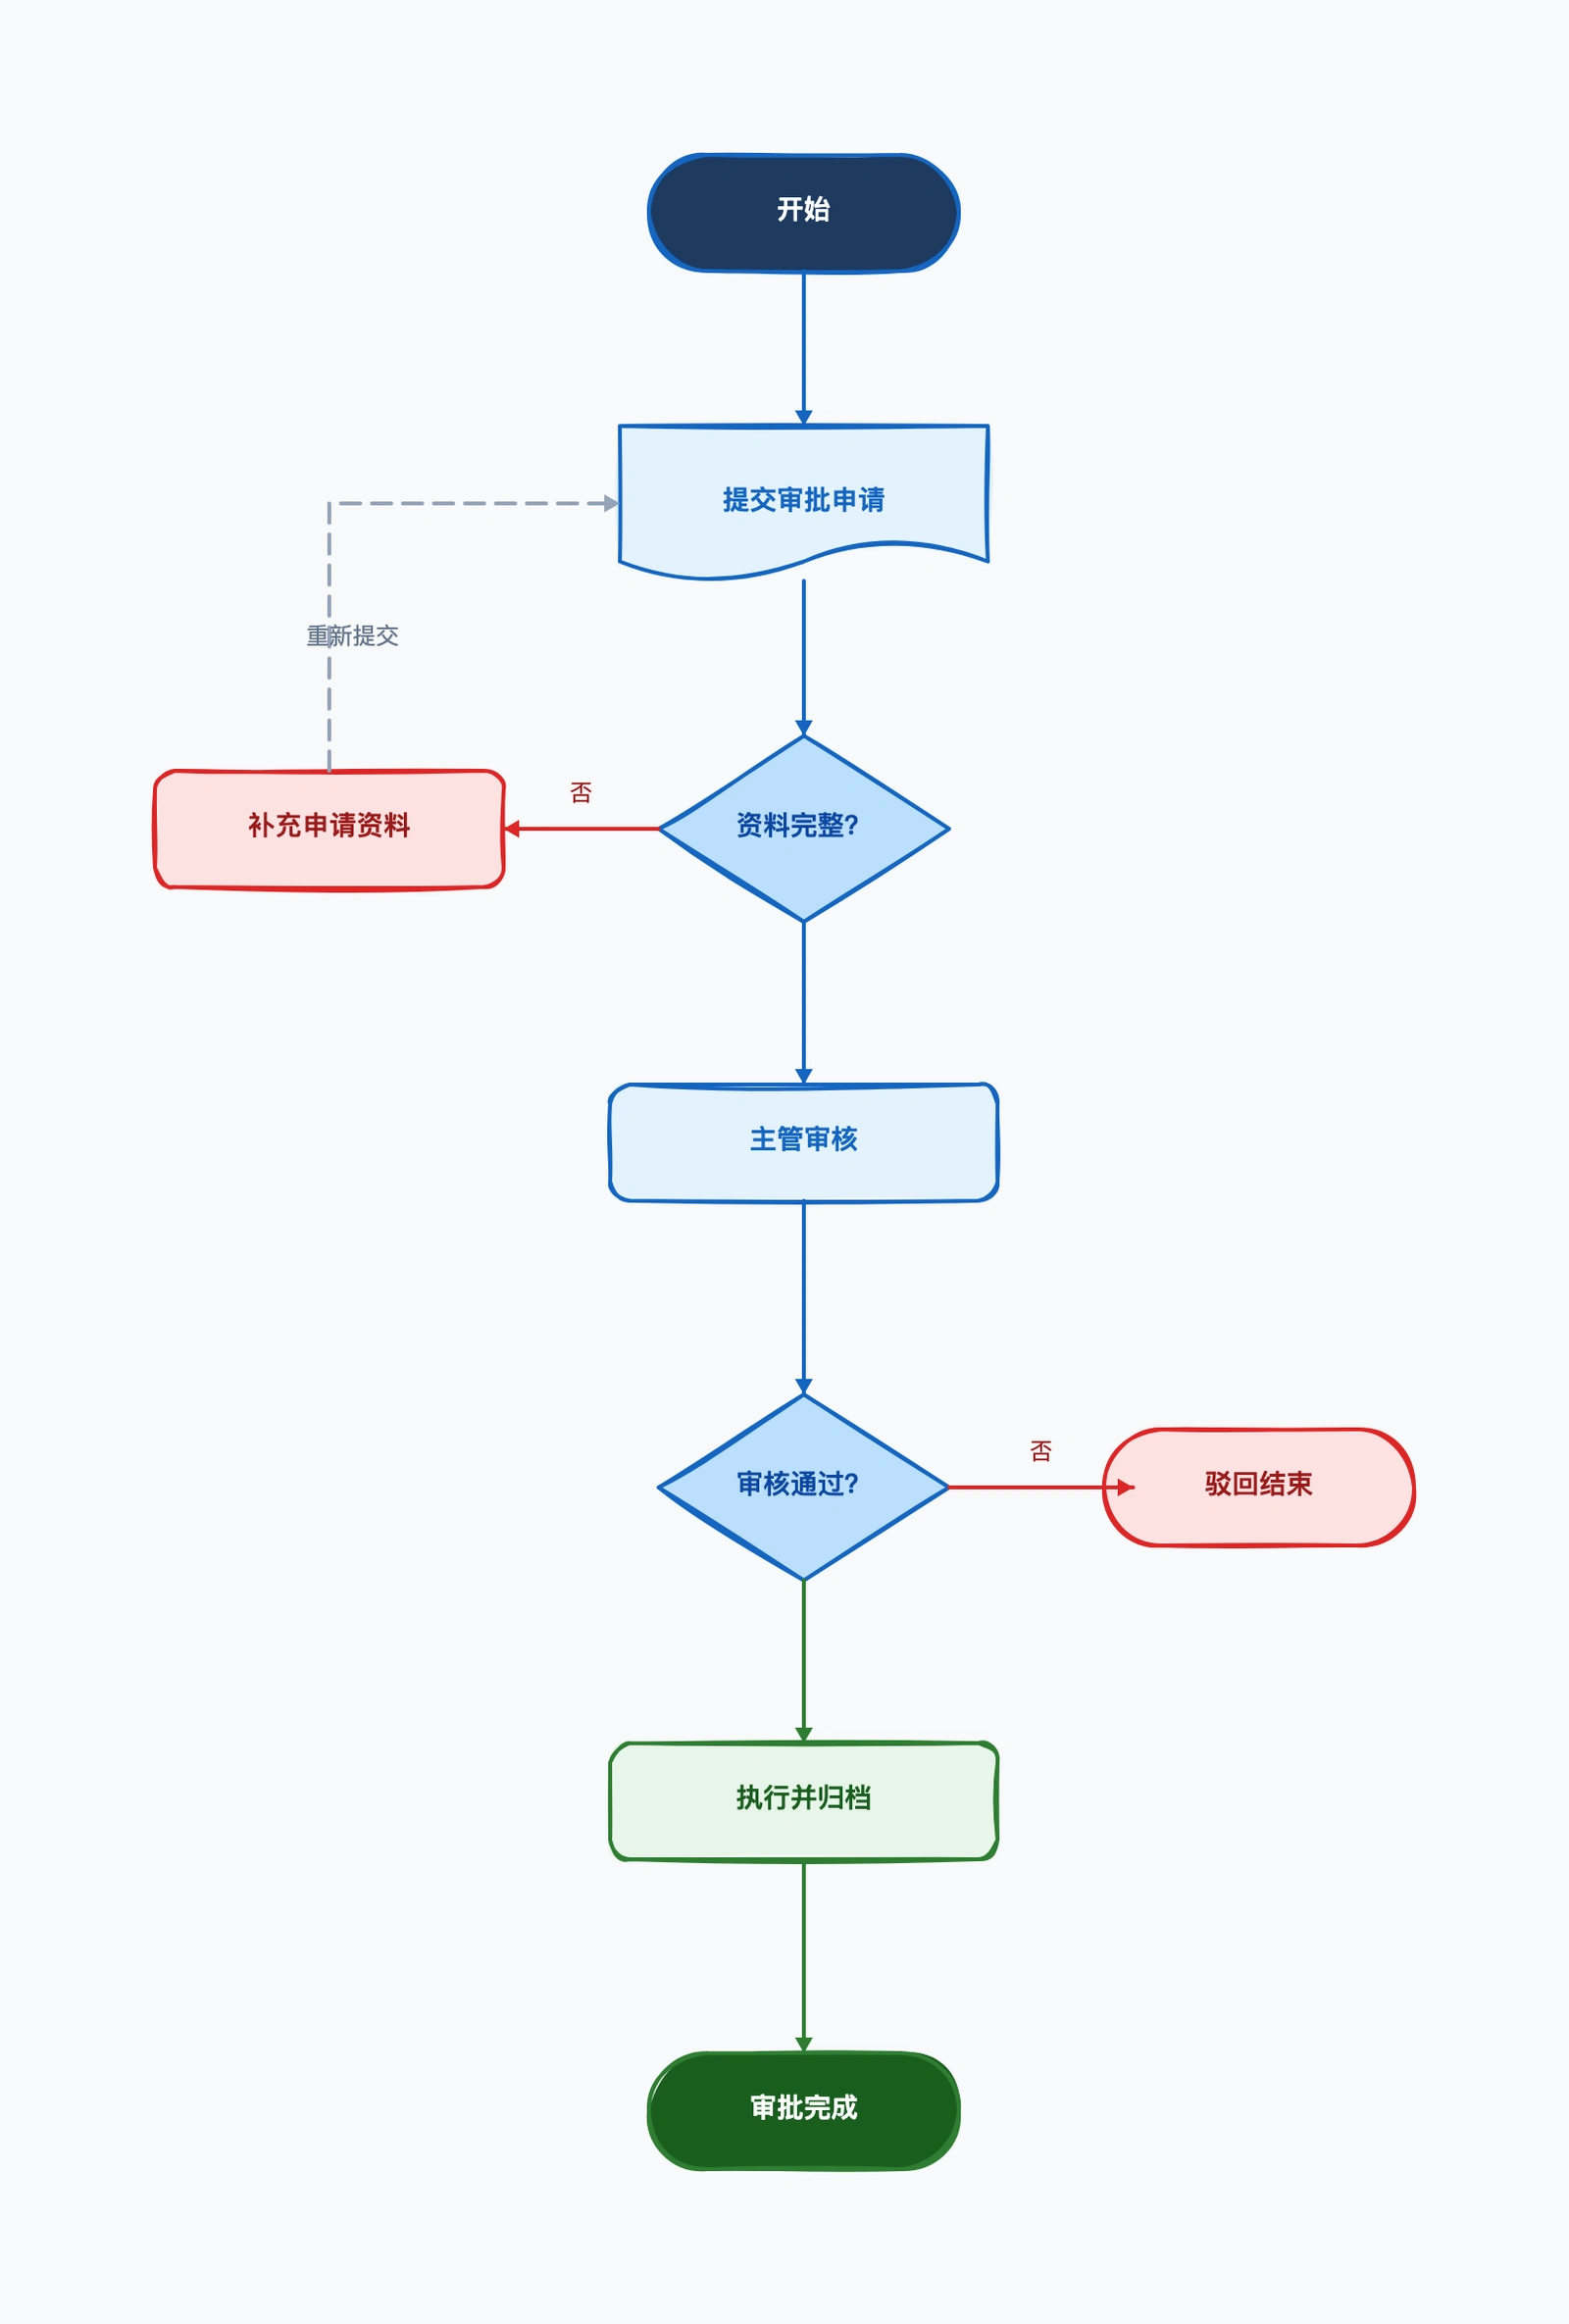
1. 开始 — 提交请求。 流程从有人提交请求开始:采购、内容稿件、预算、合同。
2. 完整性检查(判断)。 「信息完整?」如果否,请求进入修改请求步骤并回退——没人该审核一个不完整的请求。如果是,继续向前。
3. 经理审核。 第一个审批阶段。审核人评估完整的请求。
4. 审批判断(判断)。 「已批准?」这是核心分支:
- 是 → 处理并归档 → 已批准(终点)
- 否 → 回退到修改请求,让申请人针对反馈修改后重新提交
5. 终点。 流程有两个清晰的终止符:已批准(请求已处理归档),以及把工作退回而非丢弃的驳回环。
驳回时的回退环正是让它成为流程图而非清单的关键。用这个模板打开流程图工具,就能看到驳回箭头如何回退到修改步骤。
常见错误
没有驳回路径。 如果你的图只画了顺利路径,那它记录的是你期望发生的,而非真实流程。每个审批判断都需要一条「否」分支。
判断出路没标注。 每个菱形出路都要标注——「是/否」「批准/驳回」。没标注的分支逼读者去猜。
跳过完整性检查。 把不完整的请求送进审核浪费审核人的时间。前面加一个快速的「信息完整?」关卡能拦住它。
审批层级太多。 如果一个请求要顺序经过五个审批人,图(和流程)就成了瓶颈。流程图往往让过度设计的审批链一目了然——这正是值得画它的理由。
何时改用泳道图
如果你的审批跨多个部门——申请人、经理、财务、法务——泳道布局给每一方各一条泳道,能让交接更清晰。如果是单团队审批,上面的标准流程图更简单、读起来更快。
常见问题
什么是审批流程图?
审批流程图是展示一个请求从提交、经审核到最终决定如何流转的图,包含信息缺失或被驳回时会发生什么。
审批流程图里怎么表现驳回?
用一个判断菱形(比如「已批准?」),它的「否」分支回退到「修改请求」步骤。修改后的请求再次进入审核。
想梳理自己的流程?从审批流程图模板开始——它已经预置了请求、审核和驳回回退结构,无需注册。