Orchestrated saga (the baseline)
Who uses it: Team adding distributed transactions to microservices
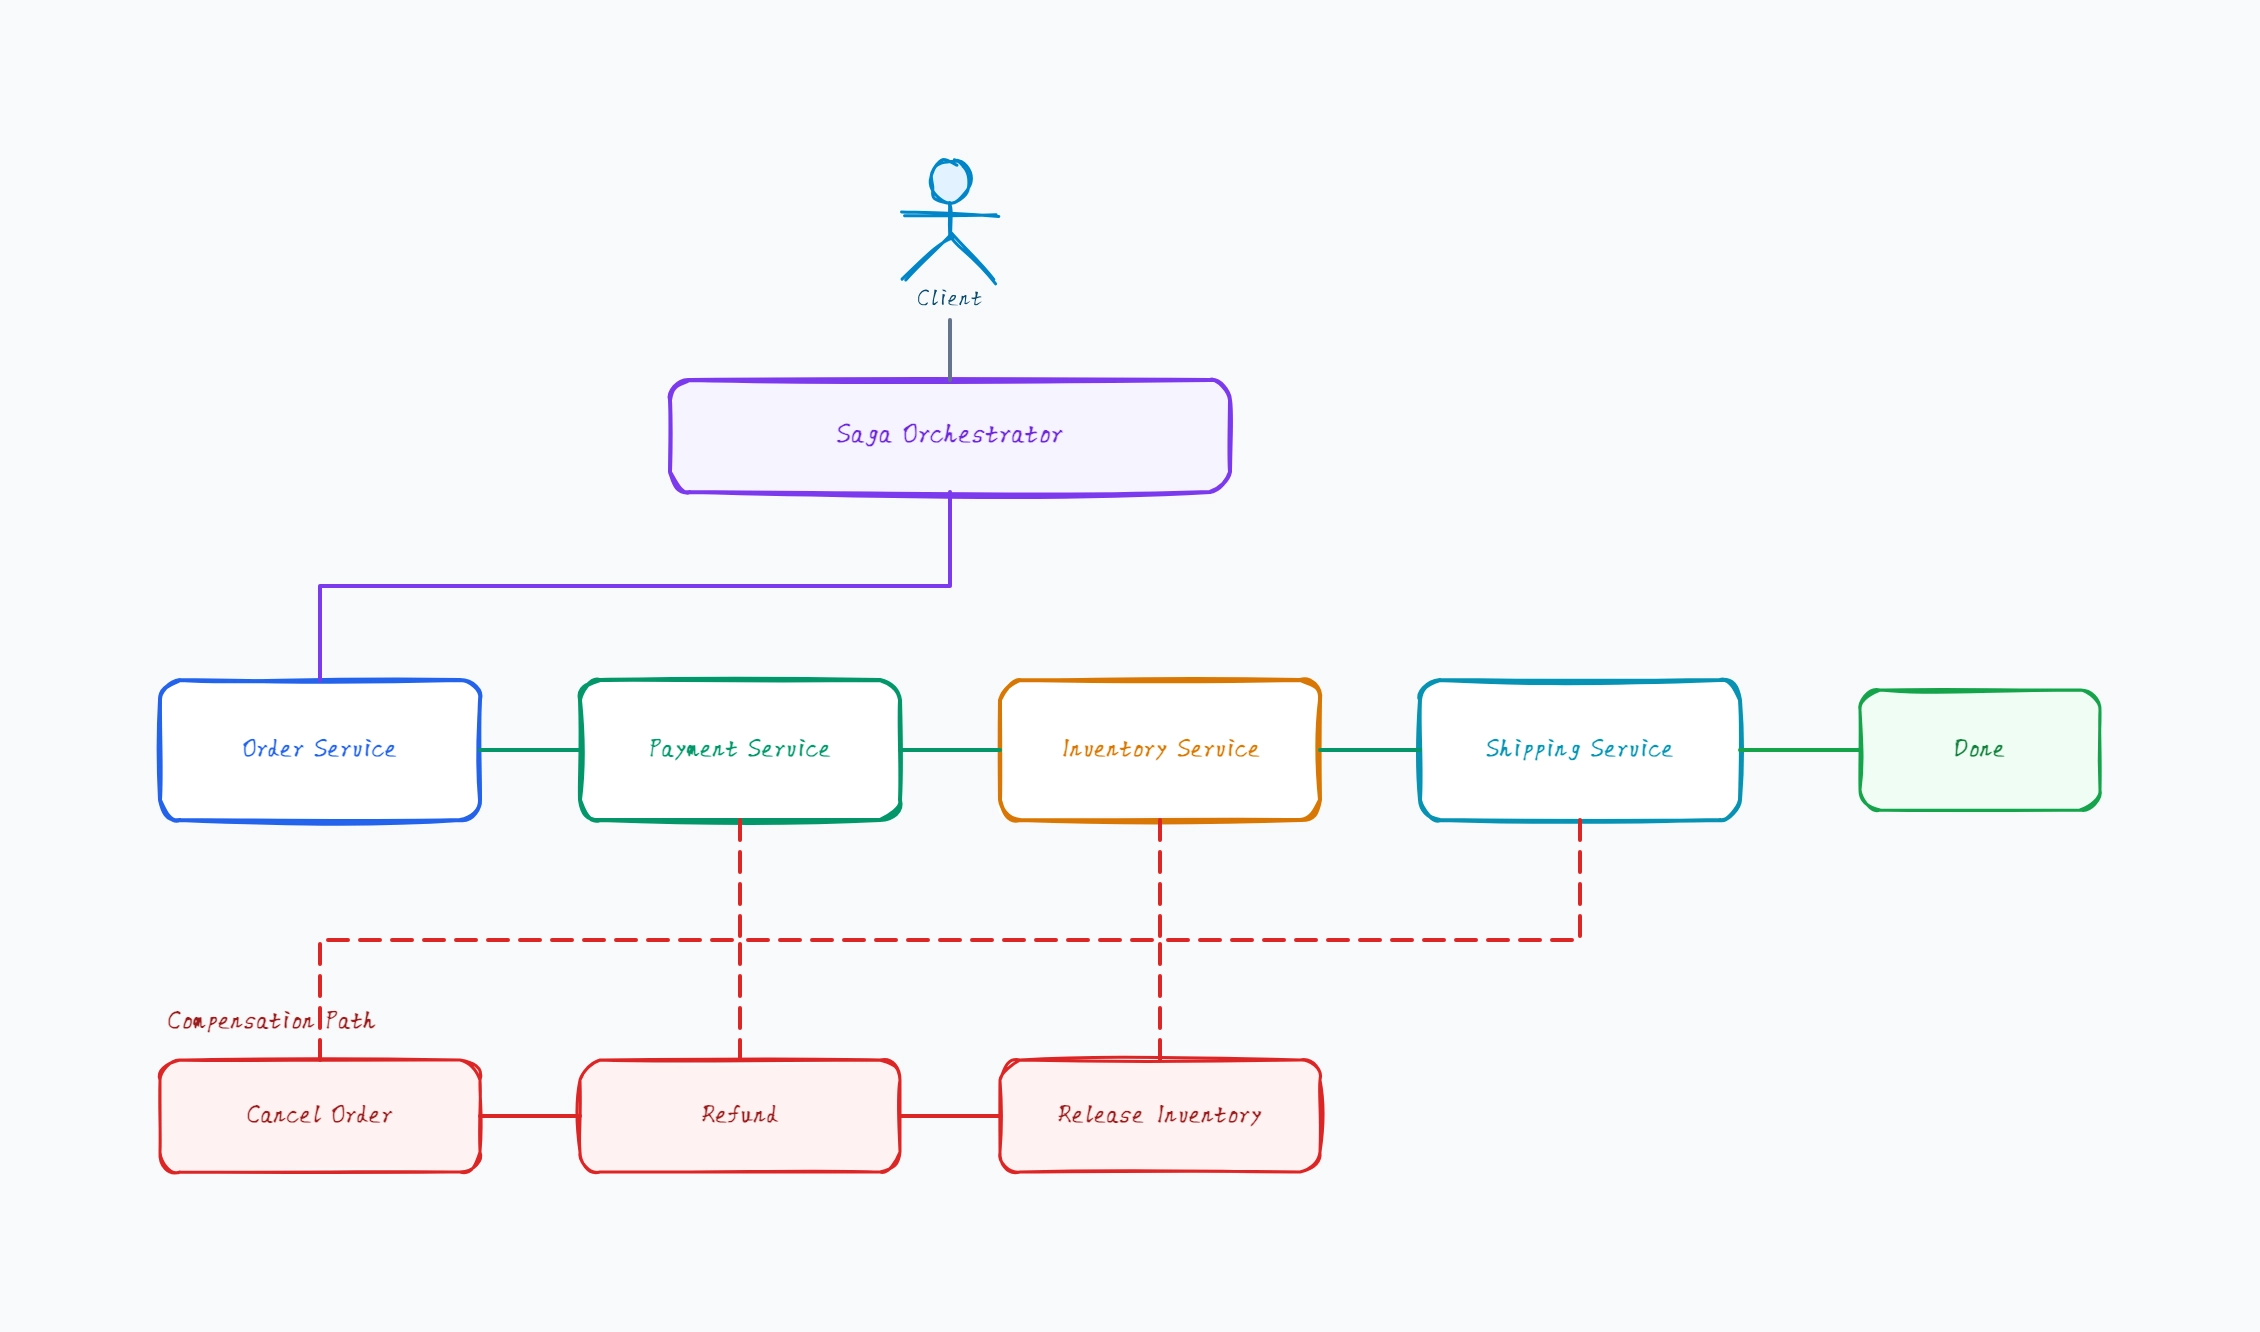
A central orchestrator drives each step
Orchestrator calls service, gets response, decides next step
On failure, orchestrator runs compensations in reverse
State of the saga lives in the orchestrator
Easier to trace and debug than choreography
Why this works: Orchestrated saga is the easiest place to start — the diagram has a clear coordinator that owns the saga state, and you can trace any failure to a specific orchestrator decision rather than chasing event chains across services.
Choreographed saga (event-driven)
Who uses it: Team that already uses an event bus
No central coordinator — services react to events
Order Placed → Payment listens, charges, emits PaymentSucceeded
PaymentSucceeded → Inventory listens, reserves, emits InventoryReserved
Failure events trigger compensation handlers
Saga state distributed across services
Why this works: Choreography removes the orchestrator at the cost of traceability — the diagram shows a chain of events rather than a central driver, which scales well but makes debugging harder because the saga's state is implicit in event flow.
Saga with timeouts and retries
Who uses it: Team handling transient failures gracefully
Each step has a retry policy (e.g. 3 attempts with backoff)
Each step has a timeout (after which it's treated as failed)
Persistent step state survives orchestrator restarts
Timeout triggers compensation, not just a retry loop
Idempotency keys prevent duplicate effects on retry
Why this works: Real sagas need timeouts and retries — the diagram adds those policies on each step's arrows, because without them a transient network blip becomes a stuck saga, and without idempotency a retry becomes a double charge.
Parallel saga branches
Who uses it: Team where some steps can run in parallel
Orchestrator forks: e.g. Notify Customer + Update Analytics in parallel
Both branches must succeed before continuing
Compensation triggers on either branch fails
Reduces total saga latency
More complex to reason about than serial
Why this works: Parallel branches cut latency when steps are independent — the diagram shows a fork/join in the forward path, with compensation triggered when any branch fails, trading complexity for speed.